
Many New Zealand fishermen have found their love of fishing by learning to fish from the rocks. Not only is it a productive way to fish, but it also offers freedom, accessibility and affordability. Kiwi fishos who started young with rock fishing continue on as they learn more effective techniques and become familiar with the environment and how to utilise varying conditions in favour of great fishing.
Once you have purchased your rod, reel and tackle, it’s a pretty cost-effective way to fish as the very place you cast from already provides the fish with food and shelter.
Selecting your spot
Tides and currents are key considerations when selecting the ideal spot to fish from. Lots of white water and a bit of swell washing across the rocks are other factors which contribute to a successful location. Fish love currents and swells bashing on rocks because this drags food into the water for them.
Low tides make reaching your chosen spot easy, however you will need to consider heading back before you are cut off by the rising tide. Navigating a high tide can be difficult and dangerous. You may decide to stay the duration of both tides if the high tide allows for it and head back on the next low.
Around the east coast of Auckland, you can find great secluded spots which have experienced less fishing pressure. These places are usually submerged rocks which can only be accessed at a low tide.
When choosing a ledge for the day, it is best practice to ensure there is plenty of room behind you in case you need to get out of the way of unexpected swells. It’s great to bring extra gear and rods – however these are best stored well behind the high tide mark to prevent rogue waves dragging your precious gear across the rocks and into the abyss.
Berley
Berley is crucial in attracting a variety of fish. The scent and scraps entice the fish closer to the rocks. All of this is key for encouraging bigger fish to show up, offering you more opportunities to improve your catch.
Berley needs to be put into a berley cage or sack with a rope tied at the top, the rope can be secured onto a rock and the sack placed into the white water that washes around the rocks. You can also add berley pellets to the mix by scooping a handful and throwing it out.
If Kina and mussels offer a natural source of food for the fish you are targeting. Kina are easily found in more remote spots, the fish love them and they make great berley! The best way of opening kina is to crack open the top, being careful not to shatter the shell as you may lose all its contents. Throw the cracked kina into the water and watch how excited the fish become.
Water Taxing to remote spots
A great way to get to a remote fishing spot is to organise a water taxi with a few mates. It’s a great way to get a lot of gear onto deeper water ledges that are rarely fished. Always hire a charter operator who knows what they are doing and can offer you and your mates assistance to get onto the rocks safely.
Having your gear sorted the night before will make for an easy hand over at the rocks. Make sure all bags are shut and secure, rods broken down and taped or tied tightly together for ease. Dry bags are an awesome resource for stowing gear that is not waterproof.
If you’re serious about fishing on the rocks, you may want to purchase a fishing cooler-bag as they are less bulky and lighter than chilly bins. Salt ice should be added to your chilly bag or bin to keep your fish cold and in good condition.
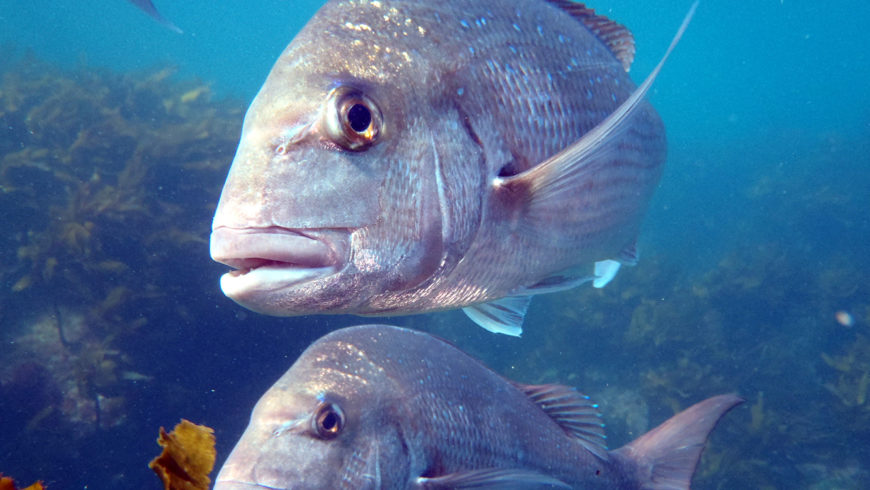
Targeting Snapper
When targeting snapper from the rocks I prefer to fish with my 12ft 2pce over the 14’6 3pce rod as it is more suited for rock fishing.
“Fish your feet first” is the old saying which means you’ll usually cast a few meters out in front of you. I find this old fishing tale to be a great technique when fishing ledges that drop off as fish are less likely to be spooked in the deeper water.
When fishing deeper ledges, it is best to lob big unweighted baits, a 9-12ft rod is an ideal length. I usually line my reel with 15lb nylon line but when I know there are bigger fish mooching around an area, I run a heaver line to 25lb. When a heavier mono is used it can become more difficult when casting out unweighted baits however, it should not be a problem to use when fishing that deeper water.
Most of my spots along the bay range from 2-5mtrs so I choose to run a lighter mono to be able to cast a little further out. The rig I use depends on the wind, structure and depth I am fishing in, but usually consists of a basic strayline rig with or without weight. When running a trace, I like to use 20-25lb fluoro but when using a lighter mainline or floating bait I won’t use a trace but will double my line by using a surgeon’s loop. This creates a double trace for a little more strength. I will then either add a little ball sinker if needed or will just run a floating bait.
The bare minimum weight should be used to get to the bottom when fishing from the rocks. Ideally the bait should slowly drift down the water column making it look as natural as possible and then come to sit nicely on the bottom.
Keeper Hooks & Techniques
Once you have settled on a rig, one or two hooks can be used. When using two hooks one is normally larger than the other. Sliding on the small hook first becomes a keeper hook, you then tie on your main hook. There are several ways to bait up depending on which bait you choose to fish with. A whole pilchard or squid bait is a good option when fishing for larger fish however I prefer to cut the bait in halves.
When using a fillet of Kahawai or mullet I cut them into cubes or thin strips, when fishing in big fish country I use a whole fillet or cut it into two big strip baits. When using a keeper hook make sure you thread your main hook through the bait first, so the barb is at the bottom of the bait, then put your keeper hook in the opposite side at the top of the bait so the hooks are well exposed. I prefer a hook either side of the baits to double my chance of a successful hook up. The sinker can either be placed on top of the keeper to run freely up and down the trace or can be half hitched to the bait to be as one.
Once you are ready to cast and are fishing a deeper ledge remember to “fish your feet first”. Big snapper often like to mooch and cruise the ledges picking up scraps from your berley.
You may need to adjust your casting distance a few times to discover where the fish are holding, once you establish this you can then target that area. To avoid snags, try not to move your line around too much, once you cast leave the bail wire open for a few seconds to allow the bait to slowly drift down through the water column.
Once the fishing heats up and the berley has brought the fish in close you may find your bait will be smashed well before reaching the bottom so always stay in contact with your bait. If the line becomes slack well before it hits the bottom quickly flick the bail wire over, wind up the slack slowly. When your rod loads up you can either give the fish some line or strike the fish.
If the line starts peeling out fast soon after casting you will need to quickly flick the bail wire over and strike the fish. Once hooked up the first 10-15 seconds are crucial, give it too much line and it will take you into the rocks and weed. You want to fight these fish hard as they do play dirty so turning the head after the first big run is vital. This will turn it away from the rough and will give you a good chance of winning the fight.
Trial and error are the only way to learn what works when rock fishing, however the more you fish the more you learn. Keep in mind not every location is the same and you need to adapt your approach and techniques to the surroundings.
Tight lines everyone!